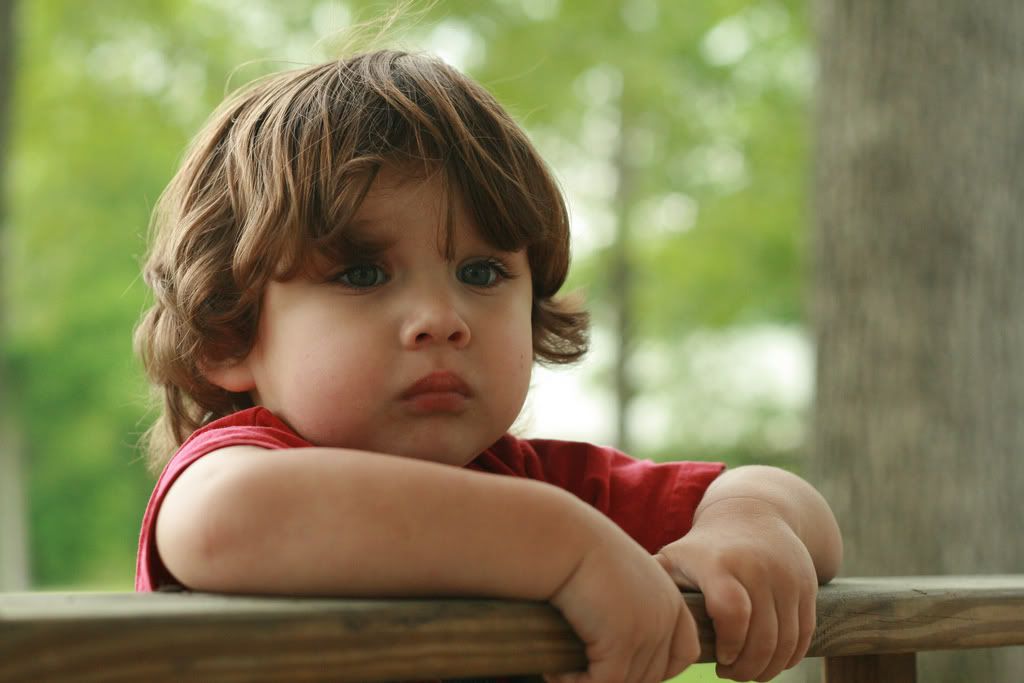
Here is the original:

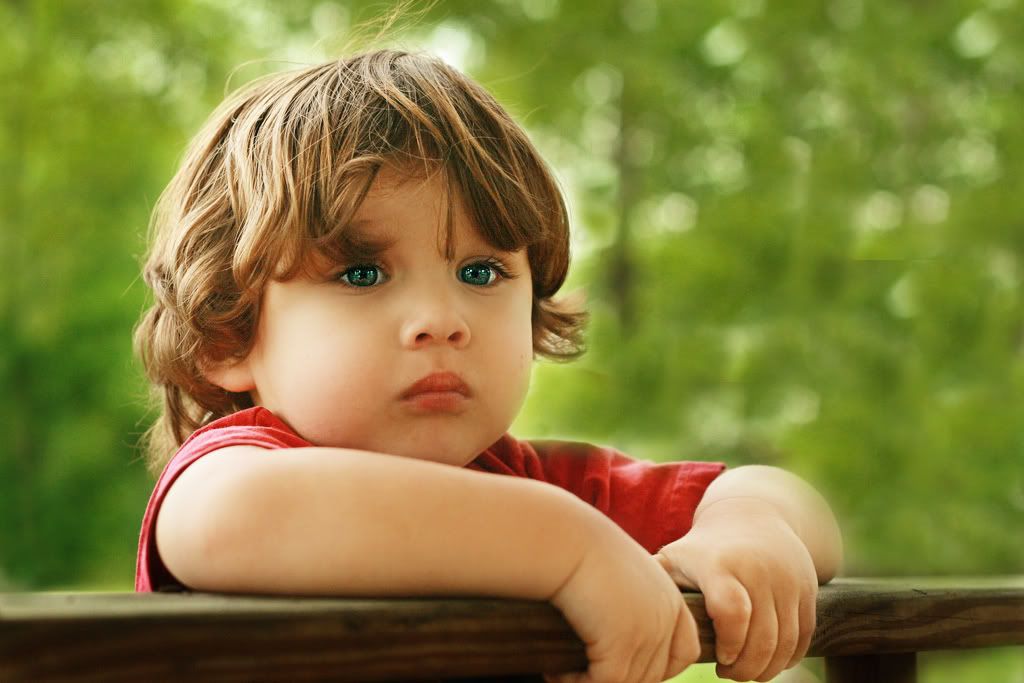
And here is my version:

I use photoshop CS4... and I am a HUGE fan of Totally Rad Actions. They have really helped me develop my style. I own both sets and usually use at least one Action on every photo you see on this blog. For this particular picture, here is what I did:
1. I used the clone tool to get rid of the tree trunk. It distracted me when I looked at the photo, and I wanted it to have a universal look. I thought about cropping it out, but I really like the little boy's hands on the rail and all the green in the background. When shooting... I keep this in mind and do my very best to keep objects like that out of my photos because cloning out every little thing can really take a lot of time.
2. I ran the TRA action "yin yang". Used the "yang" layer on the child at 77% to lighten him up a little without losing the background... and then I used the "yin" layer at 80% on the background to bring it out even a little more because I love the color! I use this action a lot because there are many times when you want to lighten or darken just one portion of a photo. That is hard to do manually.
3. I ran TRA action "pro-retouch" and used it on the child's skin at 76%. I also used the "eye bump" layer on his eyes at 25%. I love this action, because it just smooths out the skin and makes it look so milky. You just have to be careful about this one because it can also make it look very airbrushed and fake.
4. I used TRA "select-o-pop" at 100% on just the iris of his eye to pop the color a bit.
5. TRA "select-o-sharp" on his entire eye ball at 67% to sharpen up the eye and bring the focus there even more.
6. Next, I used TRA "Warm it up Kris!" at 44% just to warm up the tone of the picture a bit. I also love this action (and it's opposite, "cool as a cucumber") because it really gives it a nice color without changing the photo.
7. The finishing touch, which I use on many of my photos was TRA action "Oh Snap!" at 64%. This just kind of gives it a finished, sharp look.
I don't usually use that many actions on one photo, but for the sake of this post, I did. I also like to play around in photoshop and try new things. The more you use it, the less time it takes to acheive the look you're going for because you know what combinations you need to use.
I want to reiterate AGAIN that photoshop should be used to make an already good photo better... NOT to correct bad photos. You should be shooting consistantly (or working towards that) so that you don't have to spend a bunch of time in photoshop fixing your mistakes!
In other news... I will be heading up to Northern California tomorrow to second shoot a wedding for Muir Adams, and I'm pretty excited. I love second shooting, and I look forward to several weddings in the next month. I don't know if I'll blog while I'm gone, but I'll have tons to blog when I get back!
Happy Friday!
7 comments:
Love the eyes!! Great edits.
God bless-
Amanda
Looking forward to having you come up!
great edit! love the color & softness.
It looks like he's about to pop out of the photo! Great job. ;)
Great edit! Love the very detailed steps you took time to list down, too. Thanks for sharing. :)
Nice job! I love his skin and the eyes. :)
gorgeous! and i like that you got rid of that tree to the right, this is much better!
my edits are posted too, feel free to come on over for a visit anytime :O)
Post a Comment